Wednesday, December 25, 2013

Season of Peace and Love

December is my favorite month for many reasons. For one, it is my birth month (and one of my sisters, baby brother and mother). It is also the month we celebrate Mother's Day in my country of birth (December 8th). Finally, it is the month in which we celebrate the birth of my Lord and Savior, Jesus Christ.

This is the season of love and peace to all on earth. It is a time to celebrate the birth of He who came to this world to die, Jesus Christ, the sacrificial lamb offering who willingly gave his life in exchange for ours. It all started at a time like this, Christmas, when a young virgin gave birth to the Messiah, the Prince of Peace. Christmas is a time for us to get together and celebrate his birth; to give thanks for the gift he became to the world. It is a time for all to gather together and forget our differences and celebrate as one this joyous occasion. It is a time to dig deep into our hearts and find the love that is there waiting to be poured out for humankind.

imageIn the spirit of Christmas, we make or buy Christmas cards, we bake cookies, cakes and other goodies; we clean up and prepare our homes in preparation of those who might be coming over for a meal on Christmas Eve, Christmas Day and/or New Years Day, we buy gifts, sometimes forgetting that gift-giving is really not the purpose of the season.  I am reminded of the Advent study book we read just a few weeks ago, titled "Christmas Is Not Your Birthday," by Mike Slaughter.  It is about God's scandalous love for humankind, a love that has no bounds; a love that is generous toward us, and which, according to Slaughter, should be about our lives being transformed to become the ears, eyes, hands, and wallets of Christ, to be obedient to his calling, and to live our lives in service to those who cannot help themselves.

It is my hope that this Christmas finds you surrounded by the love and joy the season brings, but also reminds you that Christmas is not your birthday, but the birthday of the boy Jesus, God's gift to us.

Peace and love!

Pre-printed Christmas cards for clients

Handcrafted Cards cut via MTC with Silhouette Cameo

Friday, November 1, 2013

Happy Friday afternoon blog friends!

I hope you haven't missed me too much, lol. I know, I keep promising to have posts more often, but with the schedule I keep, it is not an easy thing to do.  Working P/T for two churches and then coming home to my 91-year old mother is not easy!  My day starts very early; I'm up at 5:00 in order to get to work by 6:30 (I start at 7:00 am). Why so early, because before I leave I have to make sure my mom's taken one pill (she needs this on an empty stomach before breakfast), that she's taken a shower and dressed. I then make her breakfast and have to insure her other meds are on the table to be taken with her meal.  Why do I do all this? Well, my mother also suffers from some dementia, and when she first wakes, she's extremely confused and doesn't know what she should be doing.  It is true what is said about the elderly: "once a man, twice a child". When I follow this routine, it not only helps me, it helps her as well.  If I don't do this, I will come home and find her still in bed, in her PJs, unkempt. With this schedule though, I come home to an alert mother, who is coherent and able to carry on a conversation without a mental hiccup.

Once I come home (I'm off work at 11:00 and home by 11:30 am) I prepare her lunch and go about taking care of things such as cooking dinner, cleaning or washing, and spending time in studying the Bible.  I also sometimes (if time permits) take a nap.  With the exception of Tuesday and Friday, I'm at my church in the evenings. On Monday, I lead a small group Bible Study.  We're currently reading "When I Lay My Isaac Down," by Carol Kent.  If you haven't read it, I recommend you purchase and read it. If ever you find yourself facing trials or going through life changing events in your life, this book will give you the tools you need to handle them.  Anyway, back to what I was saying. On Wednesdays I have choir rehearsal, on Thursdays dance rehearsal (praise dancing), Saturday mornings praise and worship, then on Sundays my duties vary: On first Sunday, I teach Children's Church (8:00 am only); on third Sundays I sing and dance (both at the 8:00 and 11:00 am services) and on fourth Sunday, I sing again.

Phew! That's a lot, isn't it? Seriously, I don't mind. Everything I do at church brings me joy and fulfillment and in all of this I still find time to create! If I'm not making greeting cards, I'm putting together a flyer for some event or the other.  These last two are my passion. I love being creative. I get a thrill from seeing the joy in other's faces when I create a card or make a flyer or invitation for their event.  For all of these reasons it is so hard to get on this computer and write!  But, I will try, my friends. Just bear with me as I get myself more organized to do so.

I don't want to leave you without showing off some of my creations.  Though I haven't been blogging, I do create. Here are a few of my newest cards. I made collages as I've made so many in the past few months.


 The images above are digi stamps by Robert Jackson Fine Arts. I used Gimp to make changes to the images (paint, patterns) as well as Copics (in some cases).  I also used Washi tape and paper piercing (the image in the lower bottom left and right).


These cards on the right are the birthday, get well bunch. I used MTC to cut out the boot, but prior to cutting, I changed the pattern on the boot and the shoe in Gimp using their pre-installed leopard pattern.  The Dr. Who card was for, you guessed it, a doctor friend, lol! As for the Fight like a Girl card, well October was Breast Cancer Awareness Month and I have a few friends who've been fighting this disease and was inspired to make this card for them.

This other set of cards below are again Robert Jackson digis. A few of them are exclusive to me (I have ideas about the type of image I want and I order them to my specifications).  This is the case for the two male figure cards below.  Once more I used Gimp to create the look I want for the digis, then I print and cut in MTC. I made two copies of the images so I could use mounting stickers to give them a 3D look.

For the ladies, I used Copics to paint the bodies as well as the dress of the lady in blue.  For the other lady, I used Washi tape wrapped around the paper pierced skirt and top. I then wrapped the same Washi around the background paper.


 Here are the final four.  For the moustache and bow tie card, I used my Cameo Silhouette to cut.  The Sister Act card digi is from Mo's.  I used Copics to paint the image and Stickles to embellish.

Monday, September 30, 2013

Inspired

Good morning, blog friends!

I hope you are enjoying this Monday morning. In my neck of the woods (Los Angeles) it promises to be a hot sunny day. This is typical for this time of year. Twenty-eight years ago today, I gave birth to my oldest daughter and it was HOT!

After my little vacay  (see previous post) I came back to chaos. I had to get rid of my mattress because I had a bed bug! Don't ask me how it came into my room (according to a pest control friend it could have come through the window - I live on the lower floor of my apartment unit) but it wreaked havoc with my body.  Prior to me leaving on vacation, I had been seeing these bites on different parts of my body (mostly arms and legs). What was different about these bites was, in addition to the extreme itching, my skin would inflame as if I'd been bitten by a bee (I'm allergic).  I brushed it all off thinking that it was some type of gnat bite.  While away, my youngest daughter came home for a spell (she's been living in China, where she works). She texted me to say she thought she was allergic to the food (after a year of eating vegetables and noodles she thought she couldn't eat regular food, lol) because she woke up with bites on her body. I replied back that there must be something in my room. So, she switched rooms and slept in my mother's bed.

When I got back home on July 9th, I immediately called my friend because he said that I might have bed bugs. He came over armed with a flashlight and proceeded to go over my bed frame. I have a queen size Queen Anne bed and it took a bit of looking for him to find the bug. Yep, there was only one (can you believe it) and that one insect caused me a pretty penny.  I had to get rid of my mattress and purchase a new one.

The one good thing that came from this was that I was inspired to change the look of my bedroom.  I decided to DIY my whole room by not only painting it (with the help of my youngest), but I also picked up the carpet and I'm working on putting down flooring.  Here's what the room looks like now without the bed and prior to putting down the floor.


As you can see, I painted the room Purple and Lavender (Lavender is my favorite scent, so it didn't take me long to figure out the colors I would use).  As of today, I'm still working on my flooring.  I should have it done in the next two weeks and will post photos of the finished space for you to see.

Because of the havoc that little insect caused, I was uninspired to make any cards for a while, but in August I had this burst of inspiration and started making, not only cards, but these framed pieces.  I will showcase just a few here for now.

Card
I purchased the image for this shoe from 123rf.com I printed and cut the shoe in MTC and used glue dots to make it 3D. I printed the Scripture in MS Word and cut it out and attached with glue dots. The background Damask paper is from mygrafico.com and the brown paper I printed from MS Word and embossed with Cuttlebug Anna Griffin  5x7 Pirouette embossing folder.
Framed Art

Card
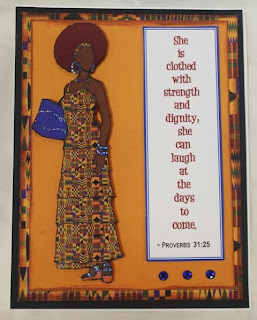
Digi file purchased from Robert Jackson. He made this image file exclusive for me. I used Gimp to add a pattern to the dress and color in the skin, hair and purse. I then print and cut the image and attached it with glue dots. As with the previous card, I printed the sentiment in MS Word and cut and pasted it to the card. The background paper I used from a Kente file I had in my stash and which I created a background for in Word and printed in color to use for this card.


Framed Art


Monday, September 9, 2013

Busy, Busy, Busy!

Hello blog friends!

I know you wondered where I've been. Wonder no more! I have had a very busy summer. After writing my last post, I prepared myself for a three week break. I went to Orlando, Fl. for a much needed vacation.  My first stop was in Ft. Myers, though. My youngest sister's best friend lives in Labelle, so we made her place our mini retreat for a few days before the madness of family and park outings.  For four days I did nothing but wake up, eat, relax by the pool for a few hours, and read (oh, I also baked). For me it was bliss!

Here is a photo of the pool and the serene scene I enjoyed. This photo was taken from the pool, which is located outdoors and enclosed in a mesh-type enclosure (all year round). The photo next to that is of the pool itself (that's my sister in the pool).
Scene outside the pool area

The pool
After those four days, we began our vacation in Florida in earnest. We were in Florida to celebrate my sister-in-law's family reunion.  We met up in Orlando on the Saturday before 4th of July for a time of fun with the kids (at theme parks), laughter, and good eats (the in-laws have two brothers who are Chefs as well as their father). The food was 'fine dining' at its best. 

The first theme park we visited was Gatorland. I'm just going to show you the photos and let them do the talking :-).  I will follow up with you in my next post to fill you in on my busy summer. 


Thursday, June 20, 2013

True to My Word

Well, here I am again, and true to my word, I'm updating you on all I've been doing for the past few months. Let's start with right after Mother's Day. I dance in a liturgical group at my church and our dance director has resigned from his position at my church after serving in that capacity for seven years. Well, as a token of our love and appreciation for him, the group wanted to get him a plaque. My creative side balked at that idea, so I volunteered to create something for him from all of us.  Here is the outcome of my creativity:

This is the mixed media piece I made. First off, using the logo and images from our group, I printed them on canvas paper (the fonts I used were not filled in which allowed me to do so with acrylic paint and/or Stickles. A day before printing, I used random watercolor doodles to add some character to the canvas. Once dry, I used a Recollections Chevron stamp and inked it with Versamark Watermark stamp pad, then spritzed it with water and stamped the canvas for some dimension. Next day, I printed to image/logo to the canvas. I then went to work. Using Stickles Platinum. I filled in the director's name. For our logo I used blue acrylic paint, then once that was dry I applied clear Stickles (which gave it that sparkle effect).

For the dancers, I used some African fabric I had stashed away. I cut a mask of the last two dancers on both sides, then traced the cut out onto the fabric with while pencil. I cut the dresses out (one red, the other green) and applied them to the dancers' image on the canvas. I then used the Stickles Platinum to add dimension to the dresses.  For the two dancers with the gold dresses, I used another medium -   Flower Soft. I added glue to the image and sprinkled it with Gold Flower Soft. Once that was dry, I went to work on the guys. For their shirts I used purple acrylic paint and followed that up with clear Stickles.  Here's a close up look at the dancers:


Once the canvas was dry, I mounted it on a piece of brown fabric. I cut the borders of the fabric using my pinking shears. I glued the canvas to the fabric, then attached it to the red African fabric. Finally, I attached it all to a woven place mat I had purchased years ago from Marshall's. To finish, I painted gold acrylic onto some Popsicle sticks, then used the Stickles to draw a pattern on them. Once they were dry, I used the pinking shears to cut the sticks and attached them to the piece. I also used acrylic on a few buttons and attached those also.

Of course, we can't have a gift without a card. Here's the finished product to the card I made. I used the Praise Dancers digital stamp by Fine Arts by Robert Jackson. I used Gimp to fill in the colors of each dancer. Once that was done, I saved it with a transparent background and added it to the background image. I then  cut that with the pinking shears and attached it to rounded card stocks (fluorescent yellow and aquamarine blue). I attached all the this to a colorful piece of fabric I'd purchased at WalMart. I finished the card by cutting out a label and stamping "We'll Miss You" to it, then embellishing it with a spot of bling.


Thursday, June 13, 2013

Busy Season

Hello all,

I know it's been awhile since I last updated my blog. It's not because of lack of creativity, however - but because I've been very busy!

It all started with Mother's Day. My oldest daughter decided she'd treat all the women in our family (relatives and closed friends) to a Mother's Day dinner - cooked by her. Now that is what I call a treat! In all the years that I raised this child, she never showed an interest in cooking. She was not as resilient as her younger sister, who, when hungry, would go into the kitchen an concoct something to eat. This is my child who was a fast food junkie as a teenager (not because I didn't cook - I did this everyday) but because she found it easier to just buy a hamburger or tacos when she was hungry.

To my amazement, this all changed when she went away to college. Hard times have a way of teaching one survival skills one would not expect to ever need. Cooking became the survival skill for her. When money was scarce, she found it less costly to purchase the ingredients she needed for a complete meal (it was cheaper to buy taco shells and ground beef to make her own tacos, than it was to purchase tacos at a restaurant or fast food store).

Even though she mastered the art of cooking, she hasn't yet attempted to make her own desserts, so she left that up to me.  I'm sorry I don't have a photo of the food she prepared - Spaghetti and Ground Turkey sauce, Salmon steaks and Mashed Potatoes, and for our veggies she baked Asparagus with ground garlic and butter - yum! Anyway, I made a cake and decided to go all out and practiced my decorating skills, lol! It's not professional, but to my family and friends, it doesn't matter. They love the taste and consistency of my cakes. Here's a photo of the cake:


I will try to update you on all the other creative things I've been doing since my last post. Hopefully I can do so in the next coming days.  In the meantime, be blessed!


Thursday, May 9, 2013

Cookies & Cakes

Hey all,

Just wanted to share my other passion - baking. I've been baking ever since I was a teenager in Panama City, Panama. Back then I was using cake mixes to make delicious concoctions. As I grew older, my taste for cake mix went stale and I started making cakes from scratch. I have a recipe that has become the staple for most of my cakes, with a few changes to ingredients here and there (forgive me if I don't post it, but it's my secret recipe and I will share it with my girls if and when they become inclined to baking, lol!

Anyway, I bake almost anything, but lately I have been in demand to make Cookies-on-a-Stick. Yes, you guessed correctly - a cookie Popsicle. I made 100 of these for a baby shower a few weeks ago (50 chocolate chip and 50 oatmeal). The chocolate chip dough is store bought. I usually buy the Pillsbury brand from Smart & Final (I love this brand better as the cookie is moist and raises to fit the cookie mold). The oatmeal dough I make from scratch.  Here are samples of both cookies, baked and wrapped ready for delivery! I'm getting ready to make 100 more for a Champagne Sip next Friday!  BTW, the cookie mold and sticks/bags can be bought at Michael's, Wal-Mart or Jo-Ann stores (for those of you who have Hobby Lobby, I guess you can find them there also - we don't have them here in Southern California).


In addition to making these, my girlfriend wanted me to make her one of my cakes (I call it a plain cake, most of my friends call it a pound cake, though mine is not pound cake as I don't use a pound of anything!). Once cooled and stack the cakes and frost them using a burnt butter icing found here. Note that my icing is darker than the one portrayed in the link. That's because I really burn the butter, I don't just brown it.

Last but not least, are some Butterscotch Blondies. This was my first time trying this one and I've already received several orders for more!  

Friday, May 3, 2013

A Season for Everything

Life is not just about having fun. It's comprised of good times, bad times, sad times, and in between times. These times are a part of every living human being.  Sad, but true.  We have to take life as it comes to us. We have the choice to let it weigh us down or to take it in stride.

I recently experienced the loss of someone who was, I believe, destined for greatness. However, God had other plans for him.  This young man was at the beginning of his young adult life when it was snatched from him by a bullet (stray or intentional, I'm not sure). Though he left this earthly so soon, he left behind a beautiful testament as to how one should live life.

I met him three years ago. He was 21 at the time.  His life was cut short just before his 24th birthday.  The takeaways I got from his life are many.  This is what I learned about him in my short time of knowing him: He was a fiercely bold young man; he was loyal; he was not afraid to speak the truth. He was intentional in everything he did in his life: looking for a job, writing music, caring for his baby girl. He knew what he wanted in life and set out to achieve it.  I loved his fearlessness. He spoke in a commanding way and was positive in his outlook on life.  These are the things I will remember about him -- his boldness, fierceness, and fearlessness!  He inspired me to write my life statement (I found out at his home going service that he'd written one last September, and had checked off the things he'd achieved since writing it).

Though his life was cut short, I feel it served the purpose God had for him. I know he inspired my life in the short time I knew him.  As a mother, I don't know what it means to lose a child. My heart goes out to all who've had to experience having their child leave this earthly life long before their time. No parent should have to experience such a loss.  However, I encourage all to look at the good times and remember the things about them that put a smile on your face. I especially want to encourage you and remind you that you will see your loved one again. Scripture states, "Do not let your hearts be troubled. You believe in God; believe also in me. My Father's house has many rooms; if that were not so, would I have told you that I am going there to prepare a place for you?  And if I go and prepare a place for you, I will come back and take you to be with me that you also may be where I am. You know the way to the place where I am going." John 14:1-4. The Bible also states, "For God so loved the world, that he gave his only begotten Son, that whosoever believeth in Him should not perish, but have everlasting life." John 3:16.

Here is a card that I make for his mother. It reminds me of what is important in life - prayer, giving thanks and my deepening relationship with God.  Be blessed.


Friday, April 12, 2013

It's Not Just about Cardmaking


As much as I love to make cards, there's something that I'm more passionate about and that is creating flyers or anything having to do with Desktop Publishing.  Believe it or not, I find this to be more soothing than cutting, stamping and assembling.  Why? Because I don't have to leave my computer. Everything I do stems from this one place (and my imagination). Once I get a request for a flyer or any type of marketing effort, my mind immediately begins visualizing how to assemble elements that will attract the viewer(s) attention.

A few months ago, a Bible Study group I belong to - Focus Point Small Group - came up with the idea to do mission work to aid the homeless.  Our first project was called "100 Soles for Souls." It became our church's mission project for the Season of Lent and on March 24th we collected over 105 pairs of shoes and enough monetary donations to provide shoes for two local homeless shelters here in Los Angeles.

Our next mission project will target women in the shelters and it's entitled, "A Blouse for a Cause".  This project will provide the women, especially those who are mothers, with a blouse for Mother's Day. I wanted something that would draw attention to our mission and came up with the concept of blouses hanging on a clothesline.  I found what I was looking for here and, using Gimp, made the changes I needed to make the artwork speak for itself.  Here's the final product.

: <a href='http://www.123rf.com/photo_6462493_white-laundry-hanging-to-dry-on-a-clothes-line.html'>AnikaSalsera / 123RF Stock Photo</a>

Tuesday, April 2, 2013

Let's Dance!

If I had to choose the types of cards I love to make, then I would have to say it's the ones that depict people and fashion. What I mean is, I love making cards with modern day women/men/children, and anything that has to do with fashion, such as shoes (especially those that are in style) clothing, purses, etc.

This card symbolizes all of that.  I don't remember where I purchased these lovely dancing ladies, but I love what they represent - freedom of expression, movement, joy, celebration!

I cut these three dancers using Make-the-Cut. The dresses are a layered part of the cut file and all I did was cut each dress using a different patterned paper (polka dots, Zebra, and Cheetah).  I wanted to make the card as CAS as possible, as well as monochromatic, so I opted for black, white, slate grey, and dark brown.


Wednesday, March 20, 2013

Just Being Creative

There's one thing I love more than paper crafting and that is playing with graphic images. It's a plus for me when I can combine the two.  The following cards were made using both of these forms.

First, I created a card for a friend who wanted to thank the DJ that played at her husband's birthday party.  In trying to find something that fit the occasion, I used the "Lil DJ" digi by Robert Jackson and using Gimp, combined it with a background image I had in my stock collection. Prior to adding the digi to the image, I made it a png file, so the transparent file would blend in with the background image.  I then made a tag in Word and cut / paste it to the front of the card.  This is the final product.

This next card was for my sister's boss. Her boss loves to dance and since I didn't have an image she liked, she asked me to use a shoe as the theme. Again, I went into my stash of digi files and found a shoe I had used on the left. Again, using Gimp, I first filled the black shoe with the leopard pattern. I then cleaned up the image so that the spots that are highlighted in the black shoe were completely filled with the pattern. I also made the image transparent (png), which would allow me to place it on a background and not have an overlap with the white background jpeg files have. Once done, I found a background that would highlight the shoe. My idea was a stage light theme. I found the right image, though the original color was blue.  My sister's boss loves green (so do I BTW), so opening the image in Word, I recolored the background in green, added a border, and using Word Art, created the sentiments on the front of the card. I placed the shoe image on the background and then copied/pasted another copy with the same dimensions and printed it all on white card stock. I paper pierced the extra image of the shoe that I printed out and stacked it over the printed image with sticky dots that would allow the shoe to "pop out" from the background image. I finished by embellishing the card with buttons and twine to match the color of the card stock and green background, then used Stickles to add some dimension and bling to the words and image.   Hope you like it.

Wednesday, March 13, 2013

Our Purpose

God made us for His glory. There's no ifs or buts about that.  The enemy of our souls has lied to us and tried to derail us from our purpose. But Jesus came into the world to steer us back on course. 1 Timothy 1:15 states, "Here is a true statement that should be accepted without question: Christ Jesus came into the world to save sinners, and I am the worst of them."

We had not been doing what we were made for, so God, in His infinite wisdom, sacrificed His only Son, Jesus Christ, so that we (humankind) could be saved from the hold the devil had on us. 2 Corinthians 4:4 brings that point home, "The ruler of this world has blinded the minds of those who don’t believe. They cannot see the light of the Good News—the message about the divine greatness of Christ. Christ is the one who is exactly like God."  Think about it, God loved us so much, He made the ultimate sacrifice for us and showed His love in Jesus' obedience to His will.  Take the time to analyze these words, and stand amazed at what God did for us -- sinners! Yes, we've all sinned and fall short of God's glory! - Romans 3:23

What say you? Can you fathom this? If you're not a believer, it might be very difficult for you to do, but for anyone who's felt and experienced the grace of God, this would not be hard to do. 

The enemy won't quit that easily, though. He will use our past behaviors or mistakes against us, but here are words we can live by and use to guard us from that threat, "Therefore, there is now no condemnation for those who are in Christ Jesus," Romans 8:1.  Our sin was condemned in Jesus' flesh! Think about it -- our purpose is to live for Christ, to worship Him, to bring glory to His name. Every mistake or failure we have made prior to receiving the revelation of this fact, does not keep us from doing what we were made to do. 

Just sayin'

I leave you with these cards, which I feel are appropriate. The digi images are from Robert Jackson. I used Gimp to add the animal print background to the dress and colored the rest with Copics.

The second card, I just colored with Copics and used Stickles to add some glitz to the card.


Thursday, February 28, 2013

Post Valentine

Yes, I know, Valentine's Day is long past, however, since we're still in February I think it's not too late to post cards, what do you say?

I made these cards a while back, however, because I've been super busy, I wasn't able to post them to my site, so for your viewing pleasure, here they are:

I made this card especially for someone who wanted to give it to their hubby. Drawing inspiration from here and using the sketch on the left, this is what I came up with.  The background papers we digi papers purchased from Mygrafico. The papers are by Cupcake Cutiees and they're called Hearts N Love papers. The Love of My Heart sentiment was printed on Gina K Designs Red Hot and Dark Chocolate cardstock from my computer using the Channel font, and I finished by embellishing with brown ribbons and two pearl pins to which I added tiny pearls at the end so they won't stick anyone, lol!  The card on the right (below) was made using the same papers, but the embellishments were from my stash. I made this one for my brother to give to his wife. I love the play of red and chocolate, don't you?


These other cards were quickies made using cutting files I purchased from the Cutting Café. They were easy to make using Make-the-Cut. These are the finished products. Most of the papers I used were part of a stash I've had sitting around for a long time.


Saturday, February 16, 2013

Double Letterpress Technique

Hi all,

Today I'm showcasing a card I made using the Double Letterpress technique I learnt at StampTV. This was an amazingly easy technique to follow and I'm pleased with the way the card came out.

Here's the card and here is a link to the technique.


Friday, February 8, 2013

My Other Loves

Next to crafting cards, I'm passionate about two other things: cooking and baking.  I can't tell you when I started baking. I've been doing so ever since I have memory. Cooking on the other hand, is different. I remember clearly that at age 9 my dad said to my 8-year old sister and I, "It's time for you girls to learn how to cook" and he took us into the kitchen and proceeded to teach us the basics of cooking (my dad was a Chef working for the Panama Canal Clubhouse.) I've been cooking ever since. Being that I'm Panamanian of West Indian descent (my parents are first generation Panamanian and my grandparents where from Barbados (on the maternal side) and Jamaica (on the paternal).) the cooking I learnt was traditional West Indian fare as well as Panamanian cuisine.  This doesn't mean I won't try anything else. I'm game for good food.

Last week on Pinterest I saw a recipe for an easy Creamy Chicken pot Pie. I used that recipe as a guide and with a few different ingredients, came up with my own version.  I used a cast iron skillet to cook and bake the dish and here's the final product.

Of course, this offering pleased the lady of the house - my 90 year-old mother - who loves to eat and will try anything I make.

Easy Chicken Pot Pie Recipe
1 package Fajita strips
2 Tbs Organic Extra Virgin Coconut Oil
1 package broccoli, cauliflower & carrots (found in the produce section of your grocery - not frozen)
1 8oz. Cream Cheese
1 Pillsbury Refrigerated Pie Crust (when in a hurry)
1 can Campbell's Cream of Chicken Soup
Garlic
Onion
Bell Peppers
Salt & Pepper to taste

Preheat oven to 350 degrees. Sauté onion, bell pepper and garlic in Coconut Oil in skillet. Stir in fresh vegetables and add Salt and Pepper to taste. In a separate bowl, mix together the Cream Cheese and Cream of Chicken Soup until creamy. Stir it in the creamed mixture with the vegetables and cook for 3 minutes until bubbly. Place the refrigerated pie crust over vegetables, flute edges, then brush with a beaten egg to give it that golden crust look. Transfer the skillet to the oven and bake for 35 minutes. Remove from oven and let cool for 10 minutes. Serve with a tossed salad. Buen provecho!

Friday, February 1, 2013

Season of Love

Well folks, Valentine's day is fast approaching and I had to get on the ball or the day would come and go  quicker than I can say...  Last week I started working on some VD cards and I want to showcase some of them here today.


This first card makes me want to say, "Yum!" I had this paper called "I Love Cupcakes" since last year, and because I started my projects too late, I never used it. So, here it is this year.  What goes best with cupcakes? Well, ice cream, of course! got the ice cream cone cutting file from the Make-the-Cut! forum gallery. cut the file using my Bosskut Gazelle.


These next cards were made using Awesome Chalkboard Textures digital papers from Mygrafico Arts & Crafts.  I used the blackboard concept one these cards and cut the letters using a free font called Pastels. I used MTC to design and cut the letters, then attached them to the chalkboard background paper. For the eraser cut a piece of sponge from one of my many foam brushes, then glued a piece of the cardstock that frames the chalkboard stock.

On the third card, I was inspired by a picture I saw on the Internet of a mason jar filled with flower stems. I used a stock image I had of a vase, traced and cut it with MTC. Then, searching in my MTC folder for a rose cut file, I found one I liked, cut it, then attached it to the green Awesome Chalkboard Textures. I used the Pastel font in MTC and cut the "Roses are Red" letters. I finished it off by attaching little red rose buds I'd purchased at Michael's years ago for some invitations, then added some bling stones as ellipsis.

I have a few more cards I made, but will share those with you later.  In the meantime, have a wonderful weekend!

Saturday, January 26, 2013

As promised, I'm back. I'm just in between baking cookies and a birthday party, so I'm fitting this in just in case I don't get home early enough or am not too tired to post - lol!

Anyway, I purchased a few digital files from Robert Jackson and this week I was finally able to work on some of them. The first digi file is called "Cheers Gurl." I used Copic Markers to paint them and finished by using some of the stitching skills I learned in elementary school. They sure came in handy for this card! The papers I used are from my stash (can't remember who by or where from, sigh!)

This other digi is one of my favorites. It's called "Beauty BigBone." Being a healthy girl myself, I enjoy seeing and being able to purchase art depicting plus size women.  This sistah's not alone, she has her best friend in tow!  I made the card using cardstock purchased from Gina G. Designs. The collection is called Pure Luxury and the color is Red Hot. I embellished the card with Martha Stewart's Bakers Twine.  The yellow patterned paper is a digital paper, but I can't remember where I purchased it.  I colored the digi using Copic Markers.

As I stated in my previous post, I will have some Valentine cards to share with you all. Until then enjoy what's left of your Saturday. I'm off to enjoy this birthday celebration.

Ciao!
Good morning everyone!

It's a beautiful, cloudy winter morning here in Southern California, but I'm loving being able to wear rain boots and snuggle up in winter wear, :-)  I've been very busy this week with making Valentine's cards, but I will not post any of them here today as I have lots (hopefully) more to make and I haven't had a chance to photograph the finished ones as yet.

Today I want to showcase the few cards I made this week. Here's the first one. I made this thank you card for the pastor of my church. I dance in a praise group and we minister on the 3rd Sunday of every month. This past Sunday, in honor of Dr. Martin Luther King, Jr., we danced to his "We Shall Overcome" speech and Pastor Sauls, who's originally from South Africa and plays the African drums, was kind enough to play in the background to provide us with a beat for the dance. I used embellishments from my stash, with the exception of the swirl frame, which I got from here.

Oops, I just noticed the time and I have to leave for praise and worship. I will return later and upload the other cards for you to view.  In the meantime, enjoy your Saturday morning!

Ciao!!

Saturday, January 19, 2013

Season of Sadness

As the New Year is progressing, I find myself creating cards for very sad occasions -- death, illness, and encouragement. In just three weeks, five persons I know have gone through deaths in their family; a childhood friend died suddenly from an aneurysm (at the age of 44) and another close family friend was found by a member of our church. So very sad :-(

I want to ask you all to please lift up these persons in prayer, though you may not know their name or know them personally.  The Bible encourages us to pray for each other. James 5:16 states, "Therefore confess your sins to each other and pray for each other so that you may be healed. The prayer of a righteous man is powerful and effective." We are all in need of prayer. 

Here are some cards I made to send out . I will be completing the other cards and sending them out to the other persons on my list.

Blessings,

D'Bee